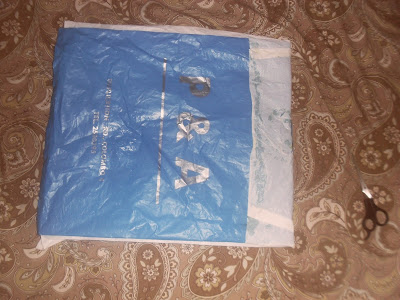
So to start off i'll say what your'll need for this tutorial.
What you need :
1) Three Shopping bags. (Two of the equal size, bit of difference will be okay)
2) Glue. I used Multibond. You better use something which pastes soo well not normal glue, but i think even chemifix would do the job. ;) & Paint brush or something to apply the glue with.
3) Nails(4) & Hammer to hang this on the wall.
4) Needle and normal thread of any color. (If you want only)
5) Siccor
How to start :
1) First get both shopping bags of the equal size. Here's mine.
My White bag is a bit big...never mind that 'coz i told we can adjust that so no worries ;) As you see in the below picture, there's a huuggee difference.
Moving on... I want you to put the big bag over the smaller one. Or say if you're having equal size pt any bag over the other... and paste each other to each other's bags from inside. This is how you do :
At the end you will get this. Make sure you cover that two holes you get to carry the bags? Paste that also inside. I covered it and pasted so no insects could go inside it.
NOW, i told you if your bag is huge... you need to adjust it when you're pasting. So take that part which is left and bend it over so the two bags become of equal size like. Like this,
2) Okay now secondly, You're going to make the opening for to put and take the bags. So bend the bag now like this,
Then cut the bag to make the opening with your siccor. Remember, cut from the side that isn't open. Because what we are aiming is to cut and opening from the middle, equally. (Look at the next picture for that) So if you cut it form the other side...it'l go bonkers -_- and everything will be messed up!
This is what you should get ;)
Now that you've cut the opening, you should be able to open the bag like this,
3) Thirdly, Sew it abit to decorate the opening. What i did was, i took a red normal thread and needle and double threaded my needle and then sew a nice blanket stitch over the opening. Here's images of it...
4) Fourthly, You're going to make take the other shopping bag i told you to get at the beginning..(the third shopping bag) and you're going to make a cover for what we already made. Purpose we are doing it is, so its closed at night and no insects would lie inside it :P ..and you can open it when you want to and keep it closed when you don't want to!!
So to start doing that.. get that third shopping bag and cut it from two sides (the bottom and one side) So my bag looked like this...
but...after i cut it? This is what both of your sides should look like... :
Front side,
Back side,
Okay now.. paste this bag to the shopping back we completed making before. Turn the bag to its back side and paste so none of the store names would be seen to the outside.
Don't paste too much from the back...paste it so the back opening wouldn't be seen at all but make sure you don't waste the space of that bag just to paste for the opening, otherwise when you put alot of shopping bags inside, you can't close it because you won't have enough bag space to close it.
So it'll stick out which will make it look ugly and weird. So anyway you should paste it like this,
When you close the from that bag to the other side, it should look like this..and see how much space you got to close it? ;)
And this is how it should look like from the front after you've pasted that at the back..
YOU'RE DONE making it !!! :D Now last part is to hang it! :)
5) Get the nails and nail it with the hammer with the bag itself to the wall, anywhere you prefer to hang it.. I ofcorse chose a position so even a tiny baby can reach because since the opening isn't so broad...if you hang it so high it'll be hard for you to reach.
I also nailed two nails on top. Because in the third bag i pasted which is used to close the opening...has two handles. And to open and close is annoying if you're searching for a proper shopping back that you want inside... so, to avoid the annoying feeling of it hanging just.. i nailed two nails on top marking the place the third bag's handles would reach to so it won't fall off but stick there till you take it off. I nailed it to an angle so when you hang that two, it won't fall off easily.
Like this,
YOU ARE OFFICIALLY DONE! Start making yours and enjoy the easiness it gives, there's tons of space to put just any size of bag inside and even easily take it out when you want to!!
Here are some of the images i did of mine... :)
Hehehe Enjoy!! (:
With Love,
xx
Kavi Sam.


.jpg)


No comments:
Post a Comment