Wednesday, October 24, 2012

Make a Table Mat with Beads!


Anybody interested in making mats? Or are you trying to get rid of those beads you've bought too much? Well i've got the ideal thing to do with them!

I was thinking about doing something with the leftover beads i got..I mean there was a set of different beads and colors which came from a barbie set when i was small... and i found it inside some drawer lol :D

Hey and this is tutorial is incredibly easy to do..You just need the skills of pasting. :P

A table Mat is my aim in this tutorial, so anyway let's get started. ;)


All you need is :
1) Set of beads. (Any color, shape or size..)
2) Multibond ( I suggest this or you can also use something else that pastes VERY well)
3) A paintbrush or a stick to apply multibond onto the beads neatly.
4) A book cover or something that the gum doesn't stick onto it (Not paper) to keep as a board..


How to :

1) First plan a design you want. Otherwise you'd end up having my first try table mat i made. :P
I mean at first i didn't know what i was going to do and then i ended up with creating something cool which looks like a mat! So pick a design, if you think you're not ready to do a professional one, just stick with a simple design. ;)

I did these two..i didn't really draw a design, but for the first one you see to the left, is what i did secondly..So that has a design. I made turns of using two colored beads to make a cool design. Yeah and i know the one to the right looks like an egg :P That's the one i did without a proper design.


2) Get your favorite designer beads and start pasting. Use the Multibond or whatever you're using to hold the beads still and pasted. Oh and I know, when you're pasting there's space inbetween. Don't worry about the spaces. Just make sure every beads has a part of it clinging onto another and you're Table Mat is in safe hands. ;)

 I had a ton of beads lol & I used diamond shapes and round ones, e.t.c..like shown in the below picture. :D


Before doing this step, make sure you READ the 3rd step aswell & come back to this step.. (:


Sooo After pasting....
This is how mine came out..I personally made a collage 'coz it will take space if i put in separate image and will be hard for you to look.


3) Paste a round or a bunch of beads only and keep it a while to dry and then taking it into your hands to make sure it hadn't pasted onto the board or cover you're using.

NOTE : It sticks alot to your hand 'coz you aren't using Normal Gum or Binder Gum. So i suggest you be alot careful.Oh and also the beads might try pasting on your hands. So try using both your palms and flattening the remaining Beads Mat you made.

4) Keep it on a flat wooden surface and it's all done! It will dry less than 2 mins.

As a result you get a Mat that will be almost like the ones you buy at shops. Even if you try dropping it really hard on the floor, the Mat won't break at all. Trust me 'coz i tried. :D

It ends with a thin layer like this.


This is what i got at the end!


Try it! (:
Enjoy! xx

Kavi Sam.

Saturday, October 13, 2012

Make an Origami Ninja Star!


So i was experimenting Origami Tutorials since i had more views for my first Origami Tutorial ; The Paper Flowers. Today I made a Ninja Star that can actually move! Its really cool. You should totally check this out & it's terribly easy to make. The image above shows the different shapes the weapon can move. But original its shown like the first picture & you can turn it back into its original position after transforming it into the different shapes.

All you need is :

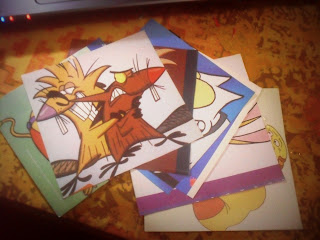
1) 8 Squared Pieces of Paper (Of the Size - 8*8, 10*10 or 12*12) You can get different colors (Shades) or a blank white sheet.. I got some left over cartoon ad papers..

& That's all you need! Now let's start!


STEPS :

 I'll show you the paper pieces i got to make this tutorials. They were 8 pieces of 12*12 sizes of paper.


| So the actually first step starts here. BEND EACH 8 PAPERS LIKE THIS.

1) Do as the collage says in steps :


Incase you don't see what the 9th & 10th steps are : (I couldn't find a proper color that looked bright, Sorry!)

9) Fold both sides of the opposite side.
10) Fold everything inside.
--------------------------------------------------------------------------------------------------

2) AFTER bending EACH 8 of the papers as in the collage above, do this collage below :


3) Now do like the above 1st Collage to EACH & EVERY paper you made in the 1st Collage. Stick it in & each piece would end up in a circle like this :


4) Do as the 2nd Collage to the last piece. Meaning, connect the two small pieces of the last paper piece to the first one to connect it & hold it firmly.

5) At the end you get this shape :


Convert it into a different shape by turning the middle part of Ninja Star. It's unwilling to move at first. But once you try, you'll get the hang of it. x)


Turn it once more to gt another shape of the weapon :


You can always turn it back to the original shape by doing the reverse side of what you did. Please be careful, its not made of metal. :P
I'm sorry it was a little hard to describe.. If you think a video would do, try YouTube. x)
That's it! 
Enjoy! xx (:

Kavi Sam.

Friday, October 12, 2012

Paint your Closet Door!

I got this awesome idea to paint my closet door while i was staring at it because i took off the photos i pasted on it and then there was some sliver spray paint put around the photos, so it looked really messed up and ultra wierd..

So this picture to the left is what i came up with. To start off,

All you need is :
1) Wall Paint (Any color, i suggest a lighter tone? Anything you wish actually)

2) Wall Paint brush (Thick and big like a wall paint brush)

3) Small paint brush (I got a normal painting brush of the size 8)

4) I used a mirror here, you don't actually need it.. If you wish you can put it (I used it because it kinda looked lonely, though my whole point inn doing this was to paste it there and make it look welcoming)

5) Multibond or something that pastes well. (If you're using the mirror)

6) Permanent Marker or Blank white paper.

That's actually it!

How to start :

By looking at the picture i know its easy for you to paint this but i will give the steps just incase you don't know. x)

1) I started off drawing rough image on the cupboard with a permanent marker.

If you want you can get a blank white sheet. (white recommended - if you aren't painting with white only) If you are using the sheet, make sure you paste it onto the door with some normal glue so you can take it off after painting the wall. I'm saying this because when you paint, you're painting with a wall paint brush so sometimes if you only paste the corners, the paint will go inside the edges of the paper and it'l be really annoying to get it off the door.

You can use any of my designs even. They were much easy to do.. :D
These were what i drew..


2) Paint with the wall paint you got! Use your small paint brush to paint outside the line of the design. (This is good if you drew it with permanent marker. But if you used the sheet for the design you can just color over the paper because the paint even go inside the edges)


3) That's it! If you're using a mirror, then paste it with Multibond on the desired place you want it to be. I ofcorse pasted it before i painted because i did not know i was going to paint the wall. -_- :P


Try it! Its really cool!
Enjoy! xx (:

Kavi Sam.

Monday, October 8, 2012

Tennis Ball hanger?


I know i haven't updated anything in a really long time but i had exams and i was pretty stressed out..so to make it up to you i have one post i got my eyes on when i was lurking through the Facebook pictures.

This is amazing to hand your things.but its not exactly as much easy as you think it is.. because well in one way it is easy because you can hang your little things, but also when you cut a tennis ball open halfway its pretty annoying to get it open to put in something into it..

In this picture though, there are two holes made for each side of a face in the tennis ball to make it look like eyes..i'm guessing without it, it would look really ugly and wierded up. :P

After you make the cut to the bottom side of the face of the tennis ball, just paste it with something more like Multibond to stick it into place forever. You can even use Blue Tack, it holds much longer too.. x)


  • To hold open the tennis ball, you can  glue a random key that you don't use into the mouth and when you want to hang something gentle like another set of key sets you can hang on it..or you can use a hook..


  • you get those in shops..so try gluing a hook into it. That way it can hold up even a coat.. ;)


Make your own, its not that bad!
Enjoy! xx

Kavi Sam.